


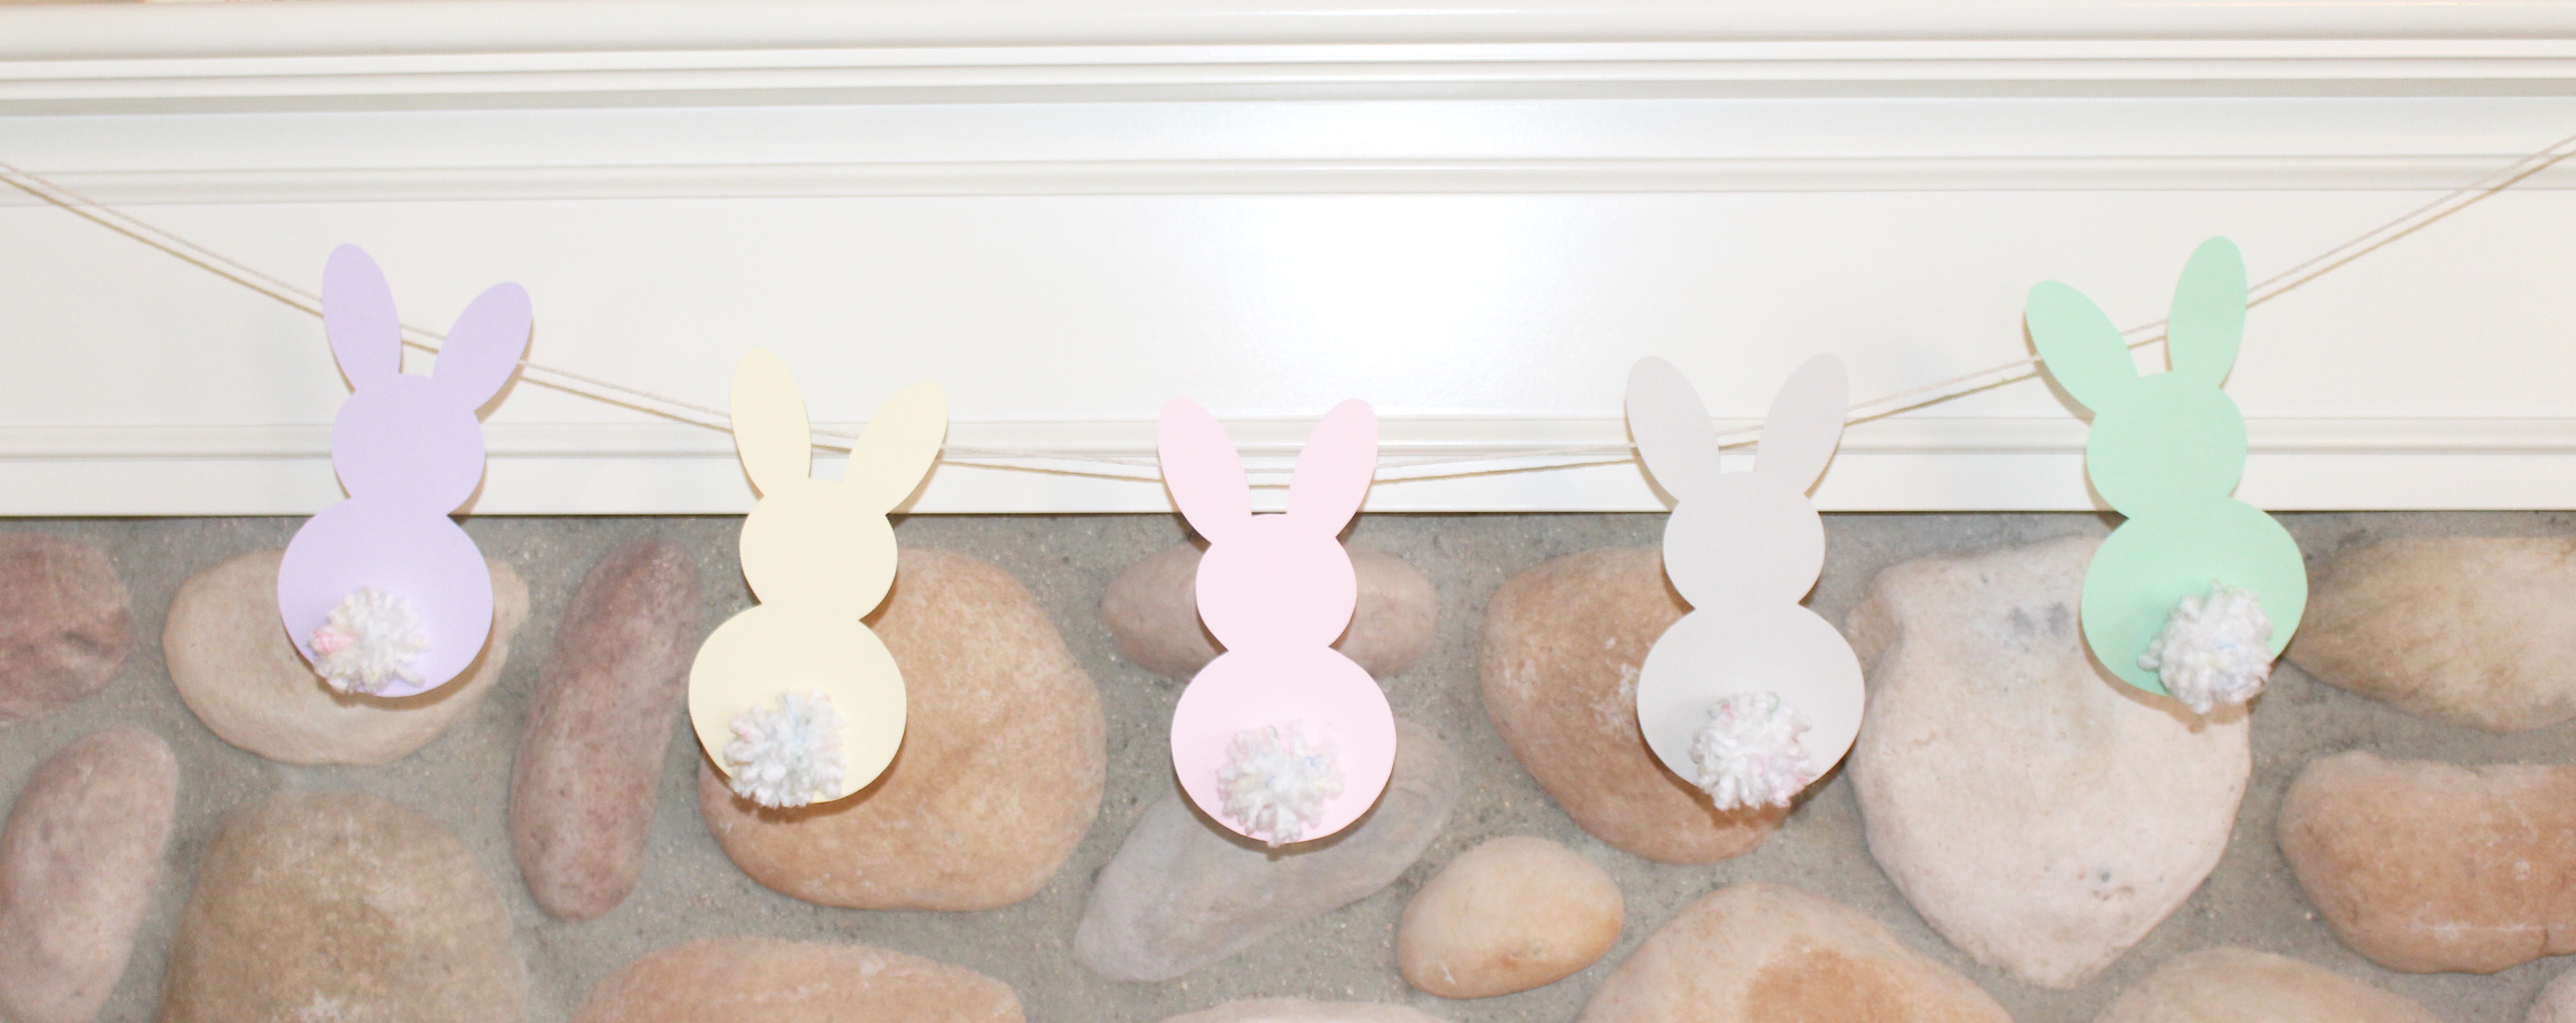
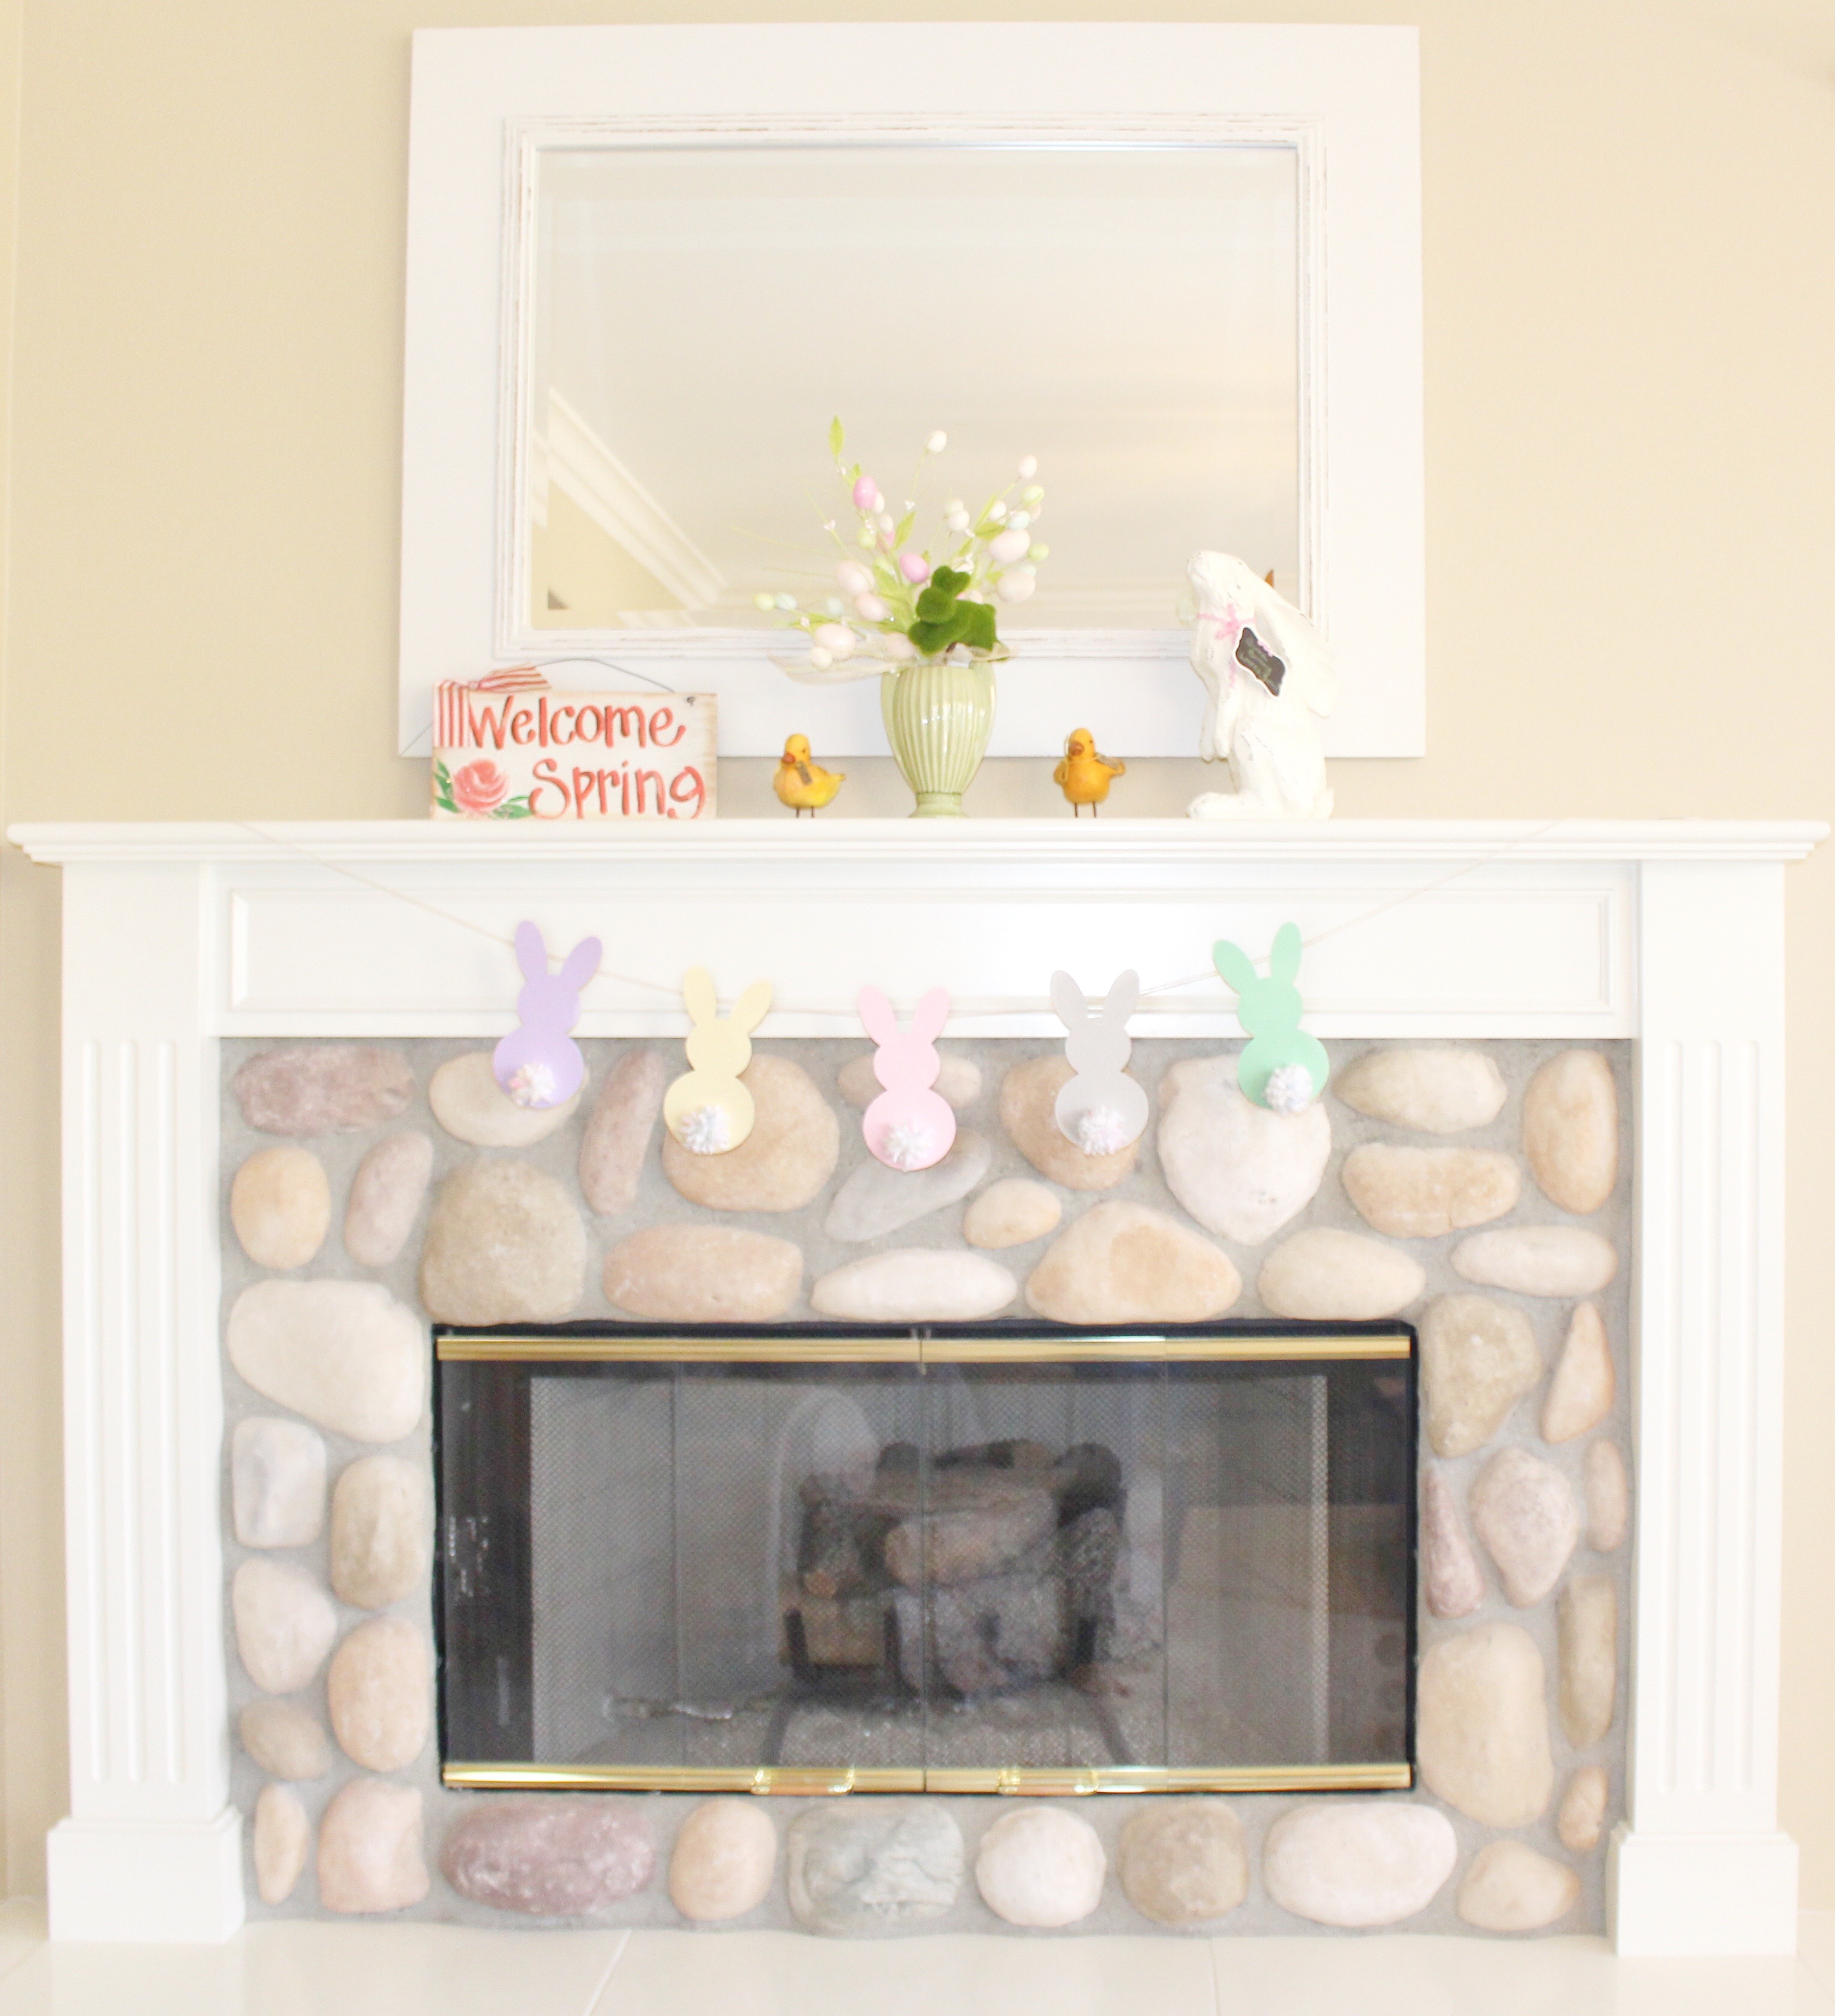
Something that you may not know about me is that from a young age I have always loved doing arts and crafts! Many Saturday and Sunday mornings you would find me surrounded by colored construction paper, crayons, glue sticks…the list could go on and on! These days I don’t have as much time to do arts and crafts, but this week I found a little time to make a cute Easter Bunny garland to decorate my mantle and I wanted to share.
Supplies Needed:
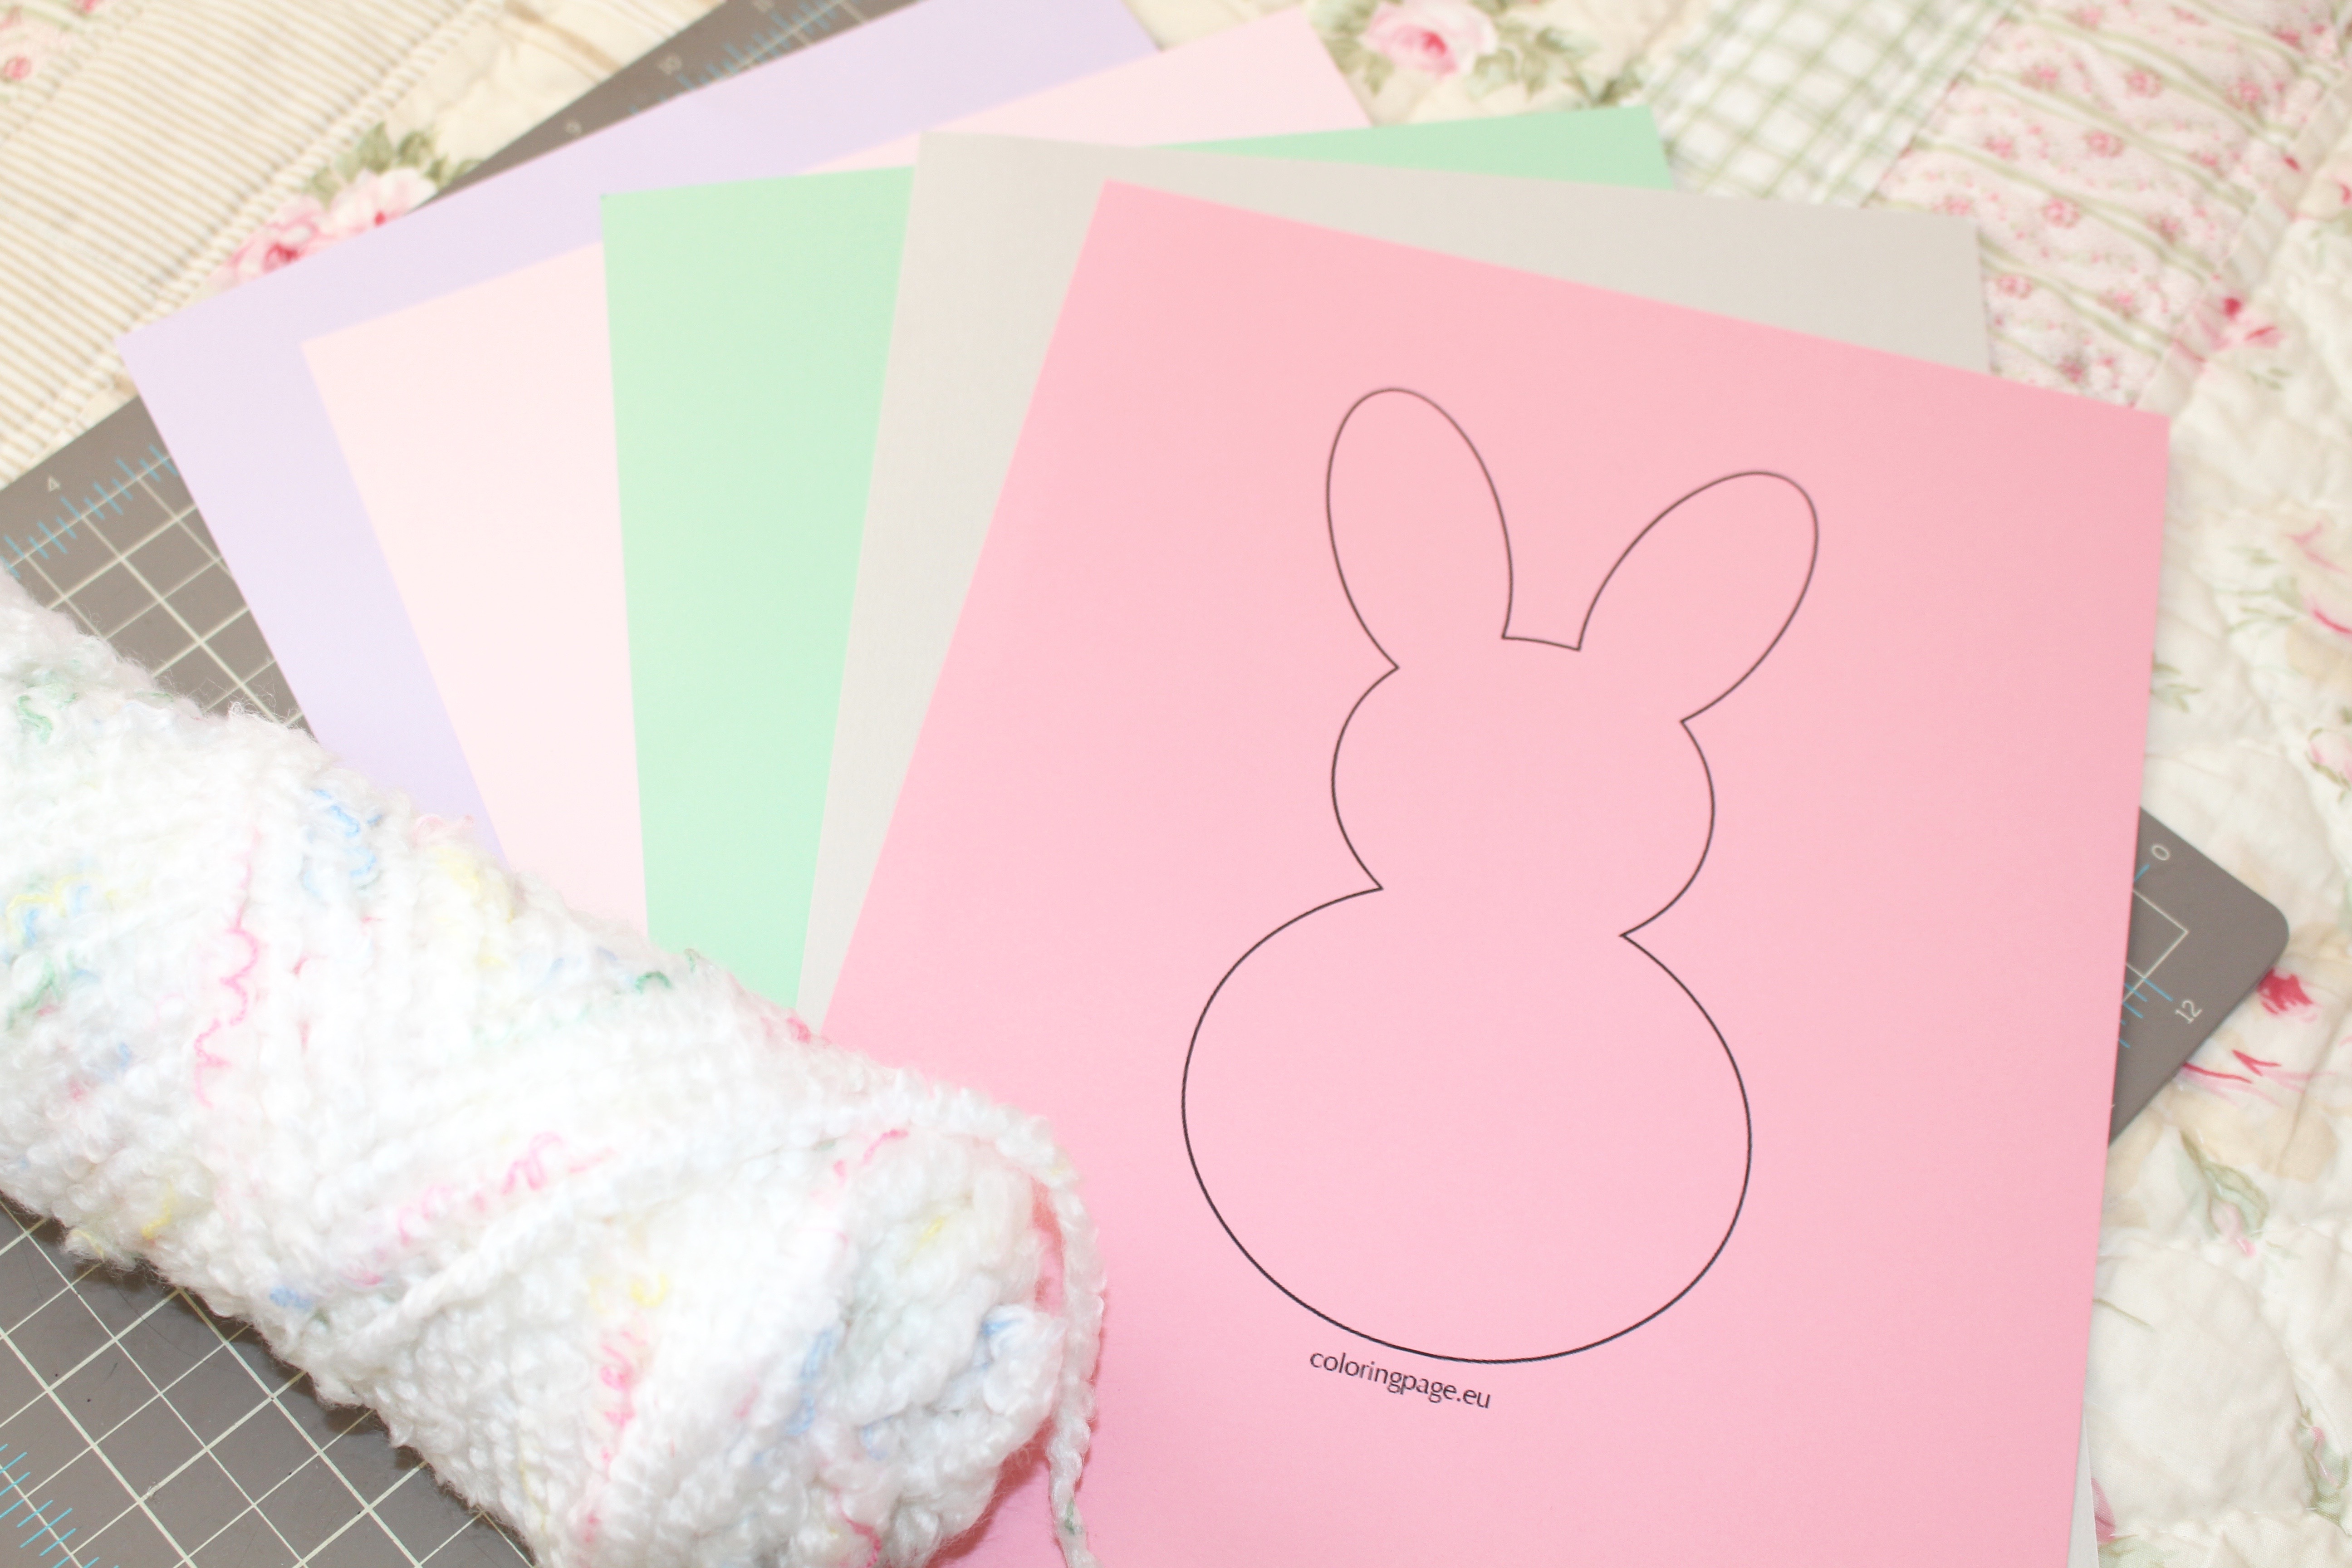
- Colored card stock
- Bunny Template (I used this one)
- Scissors
- Yarn
- Hot Glue Gun
- String or Ribbon
- Tape
Steps:
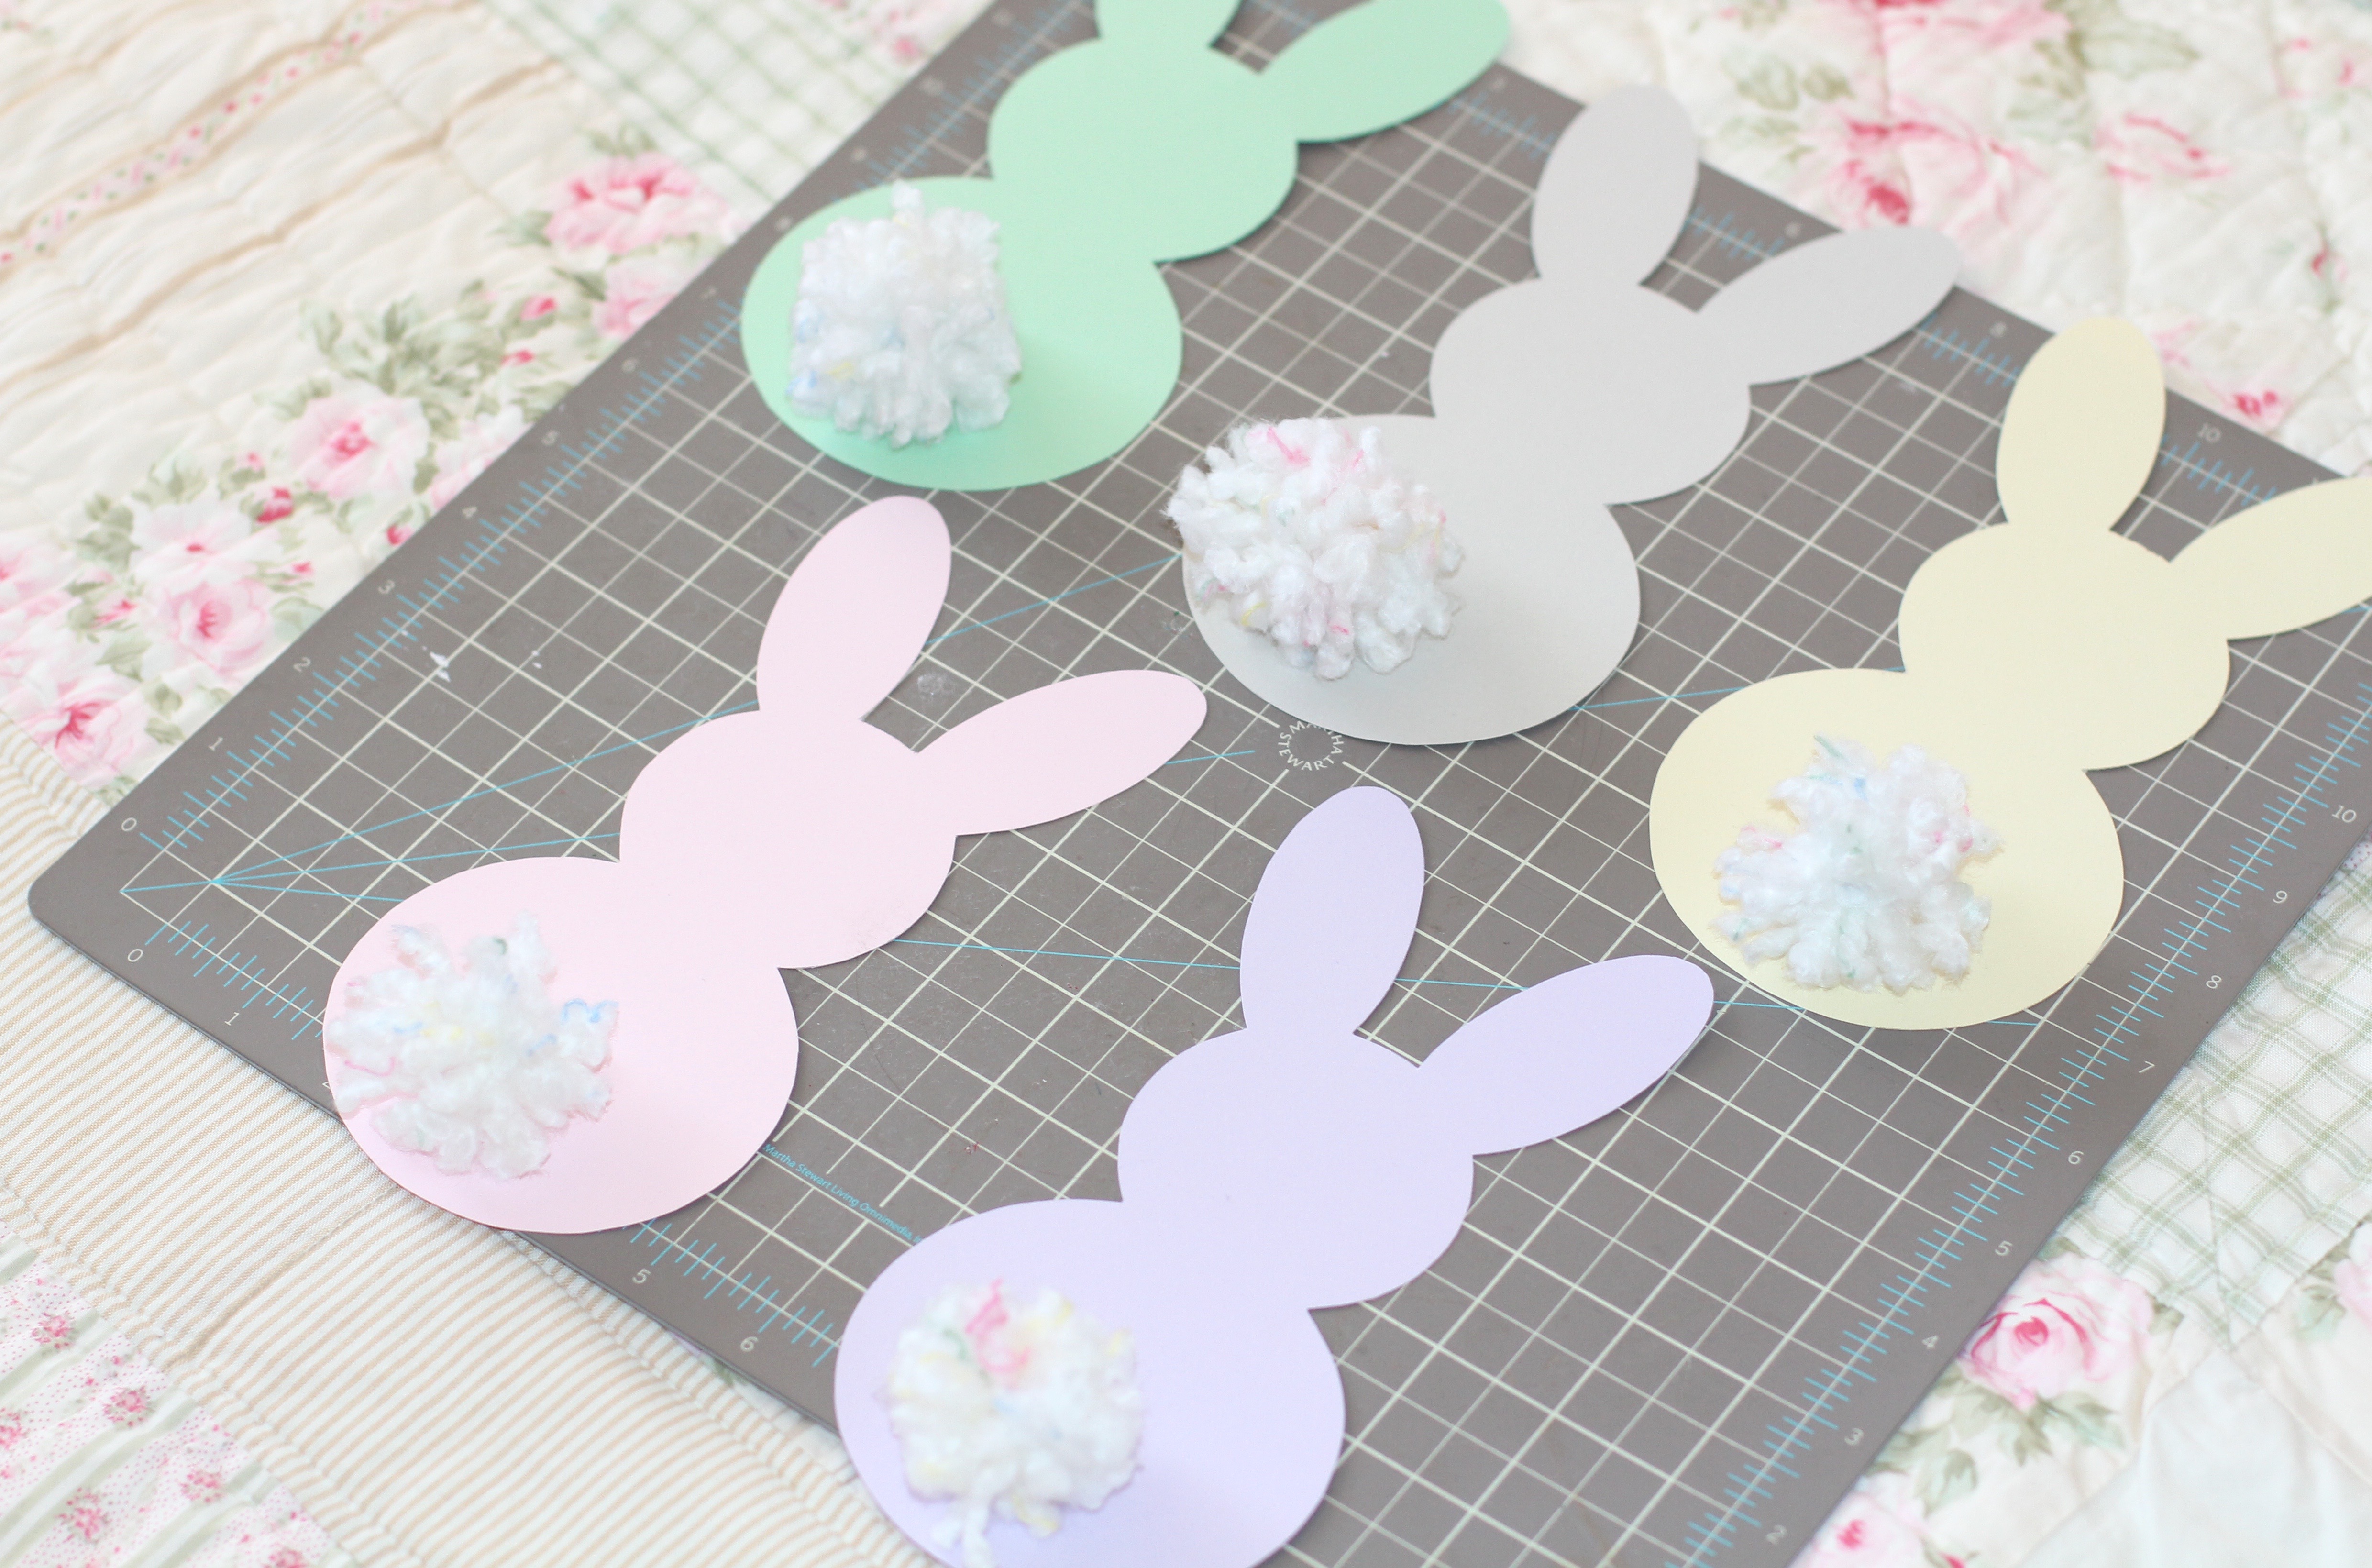
- Gather colored paper and print the bunny template onto the colored paper.
- Cut out the bunny from the paper. I cut on the inside line of the template to get rid of the black outline.
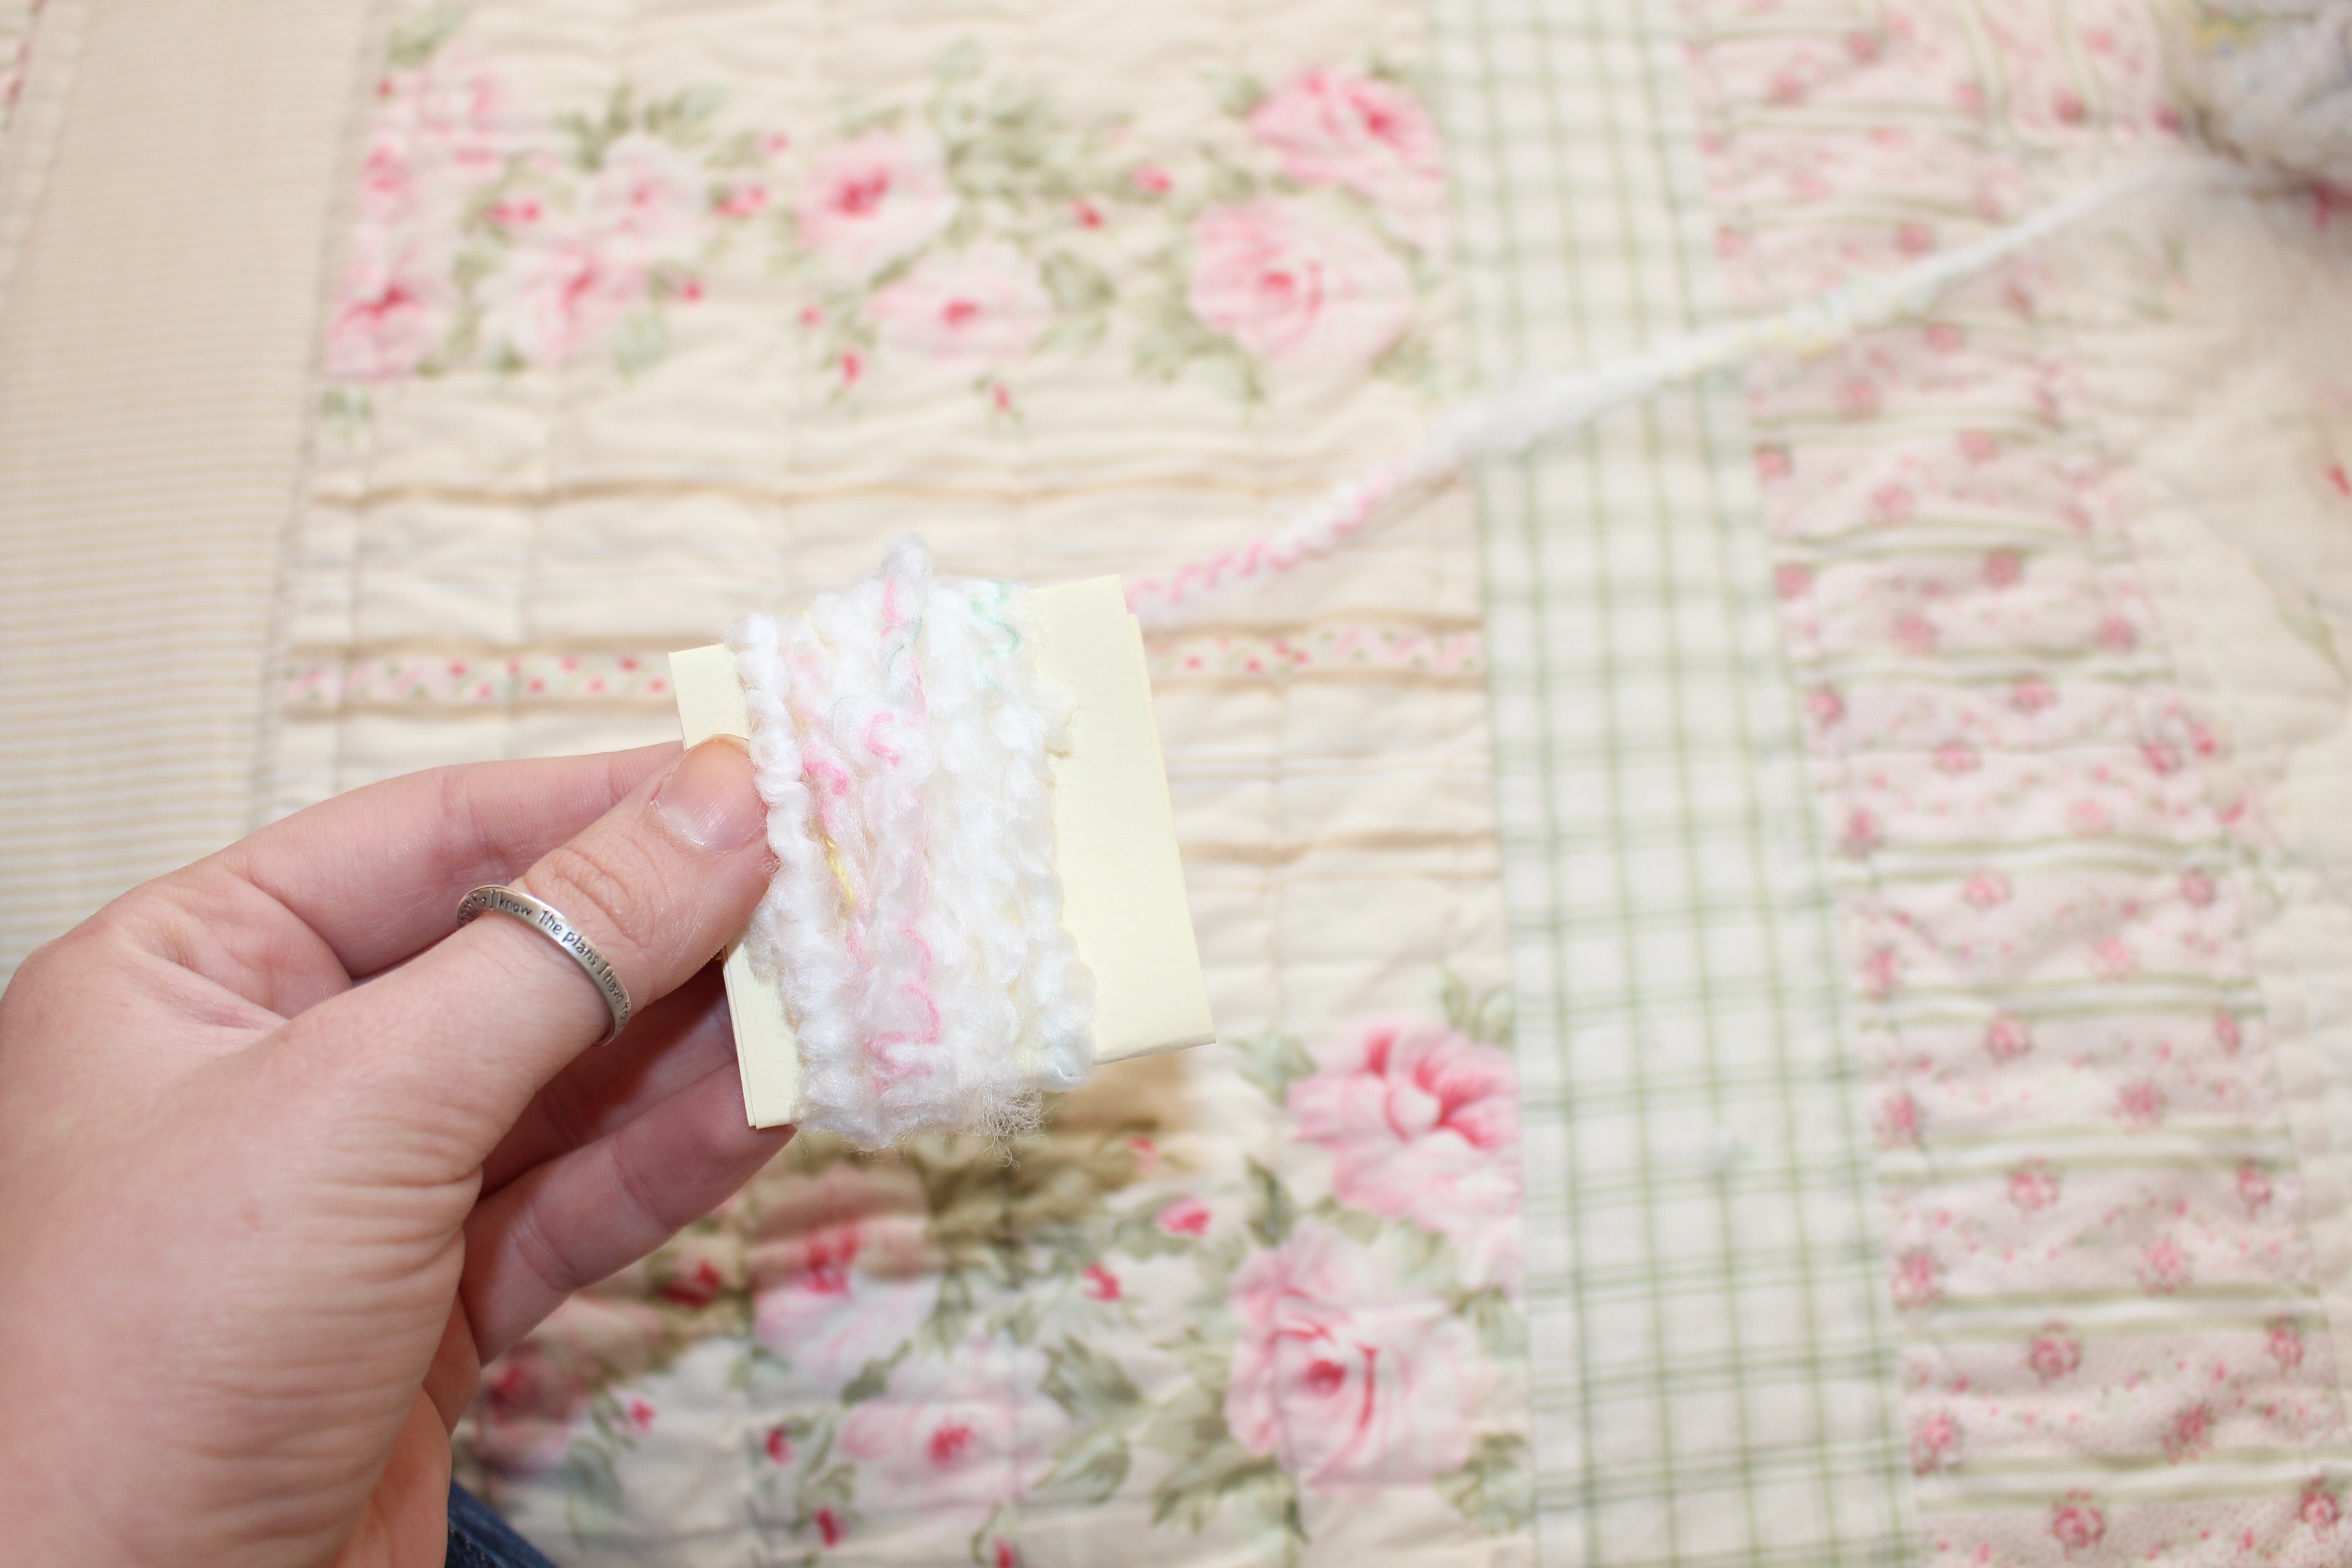
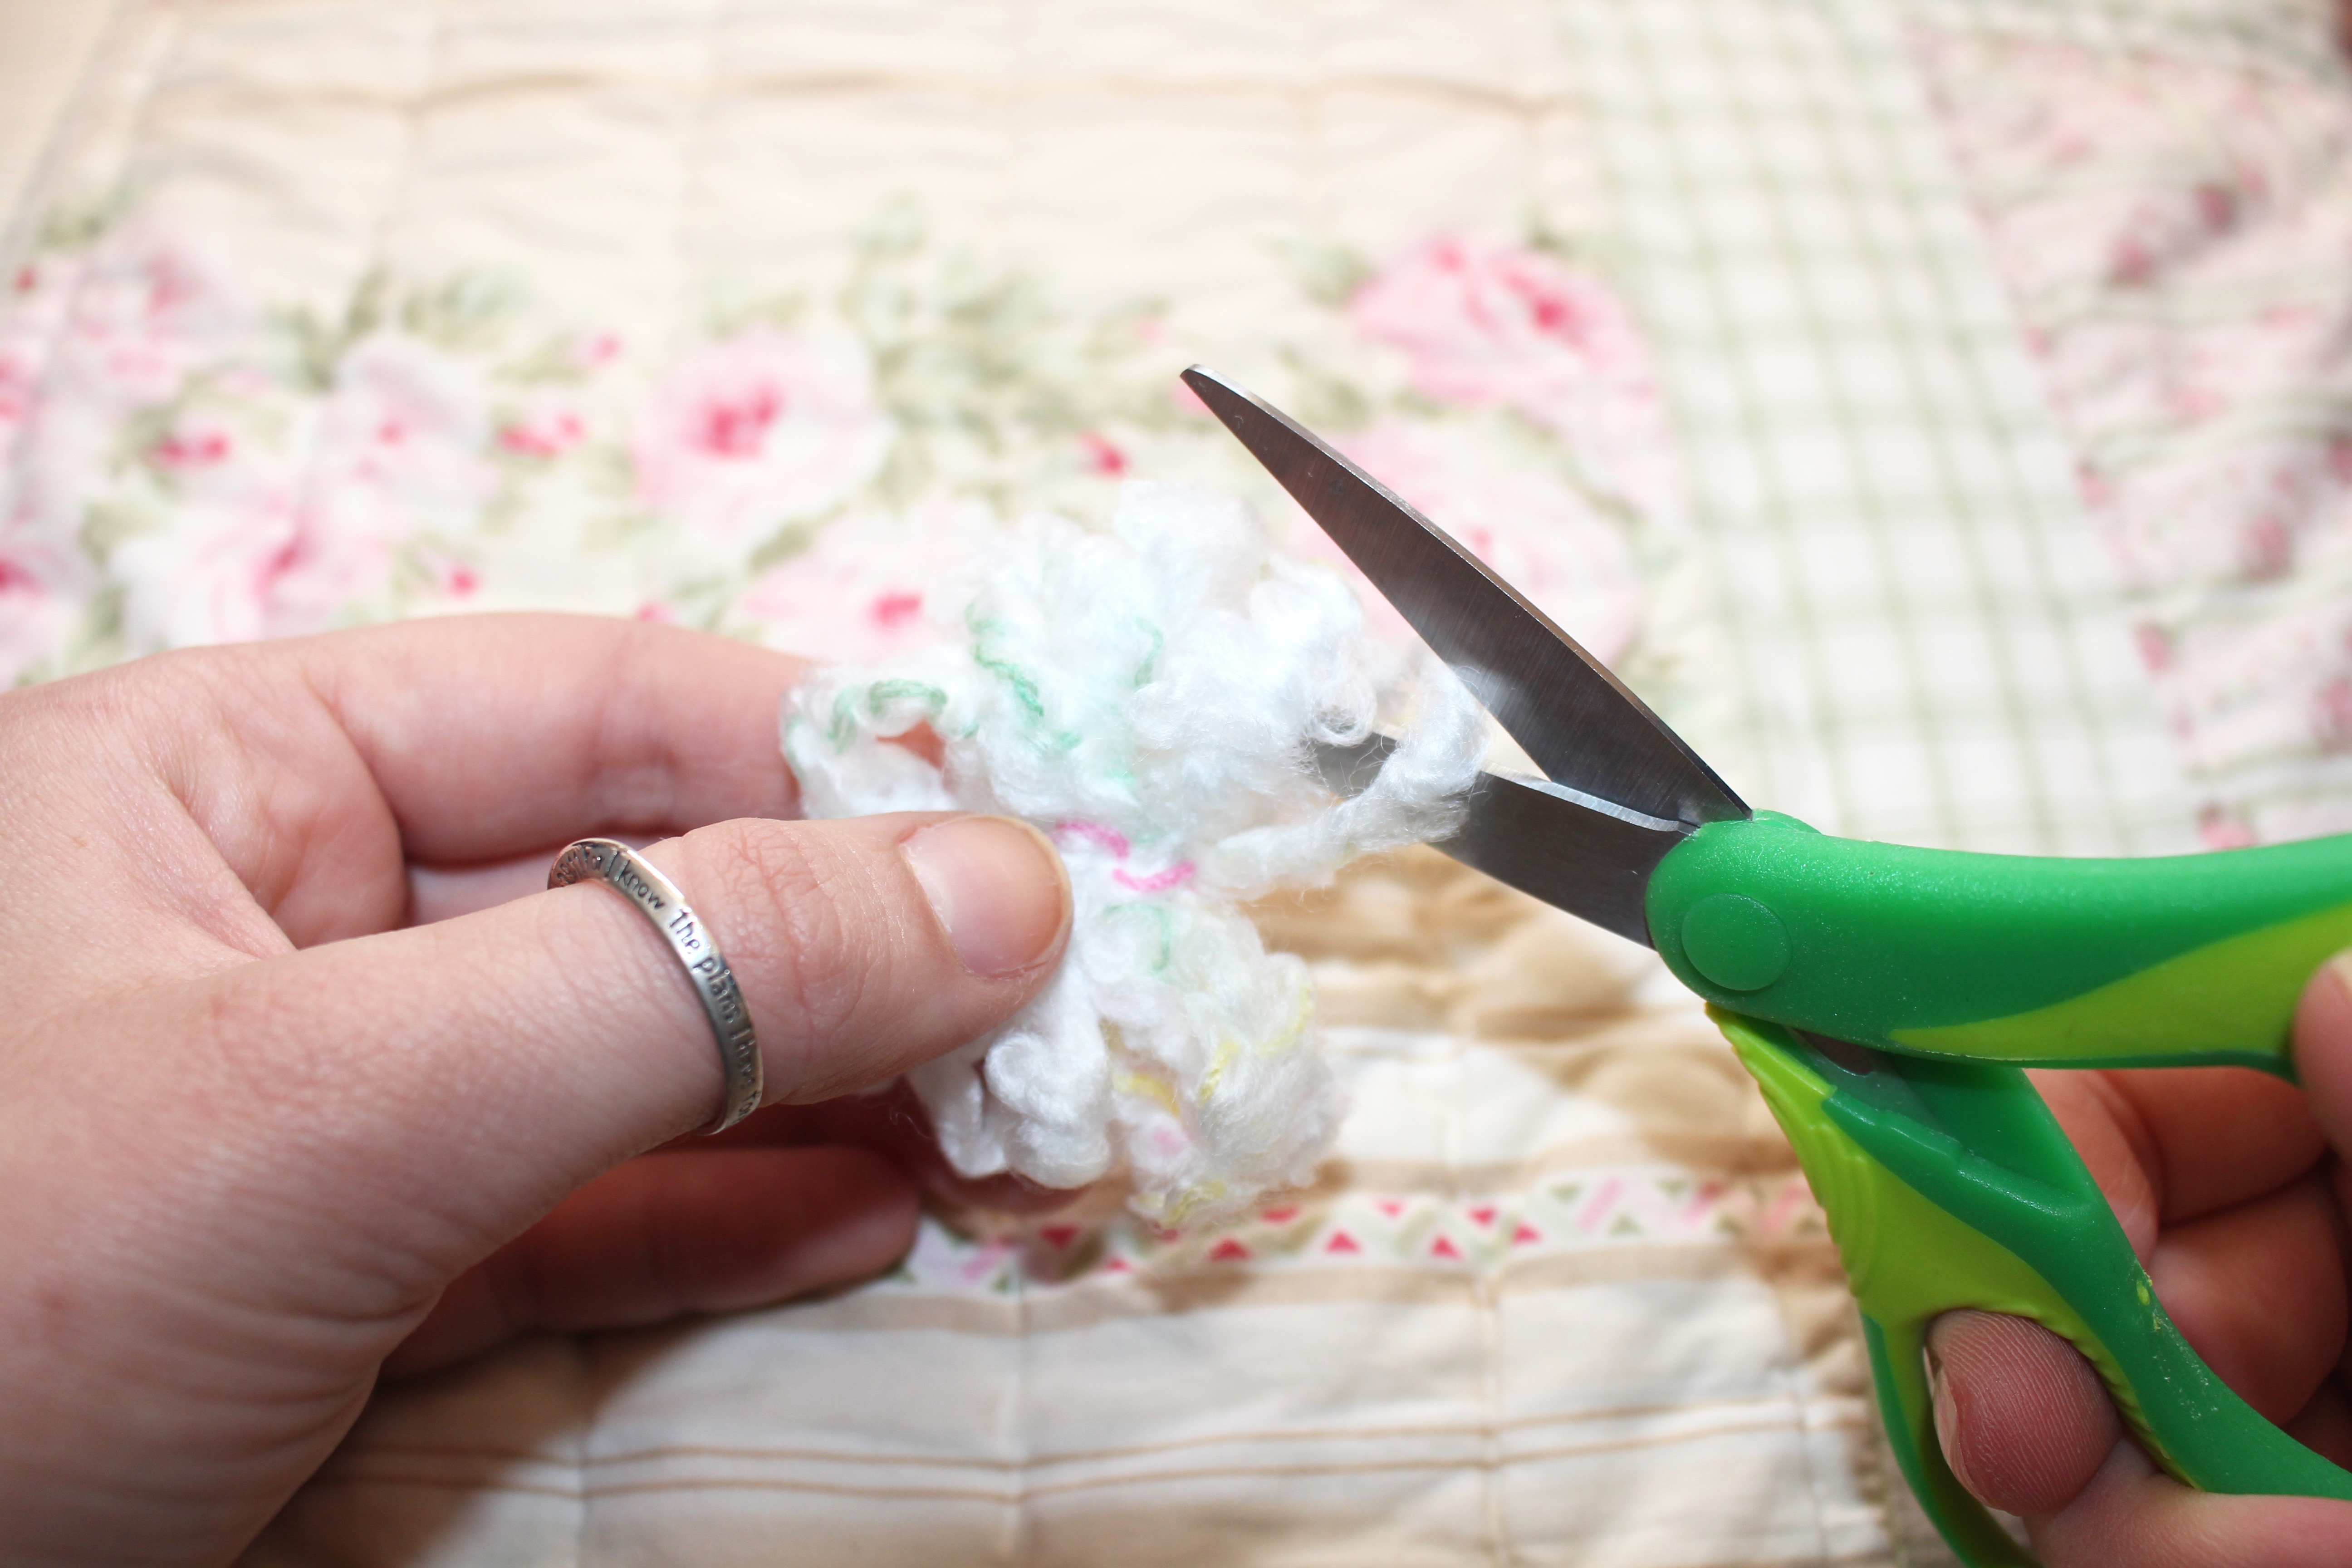
- Fold a piece of scrap card stock a few times. Then wrap yarn around it about 10-12 times (I used thick yarn so if your yarn is thinner you will want to wrap it around the card stock more times than I did).
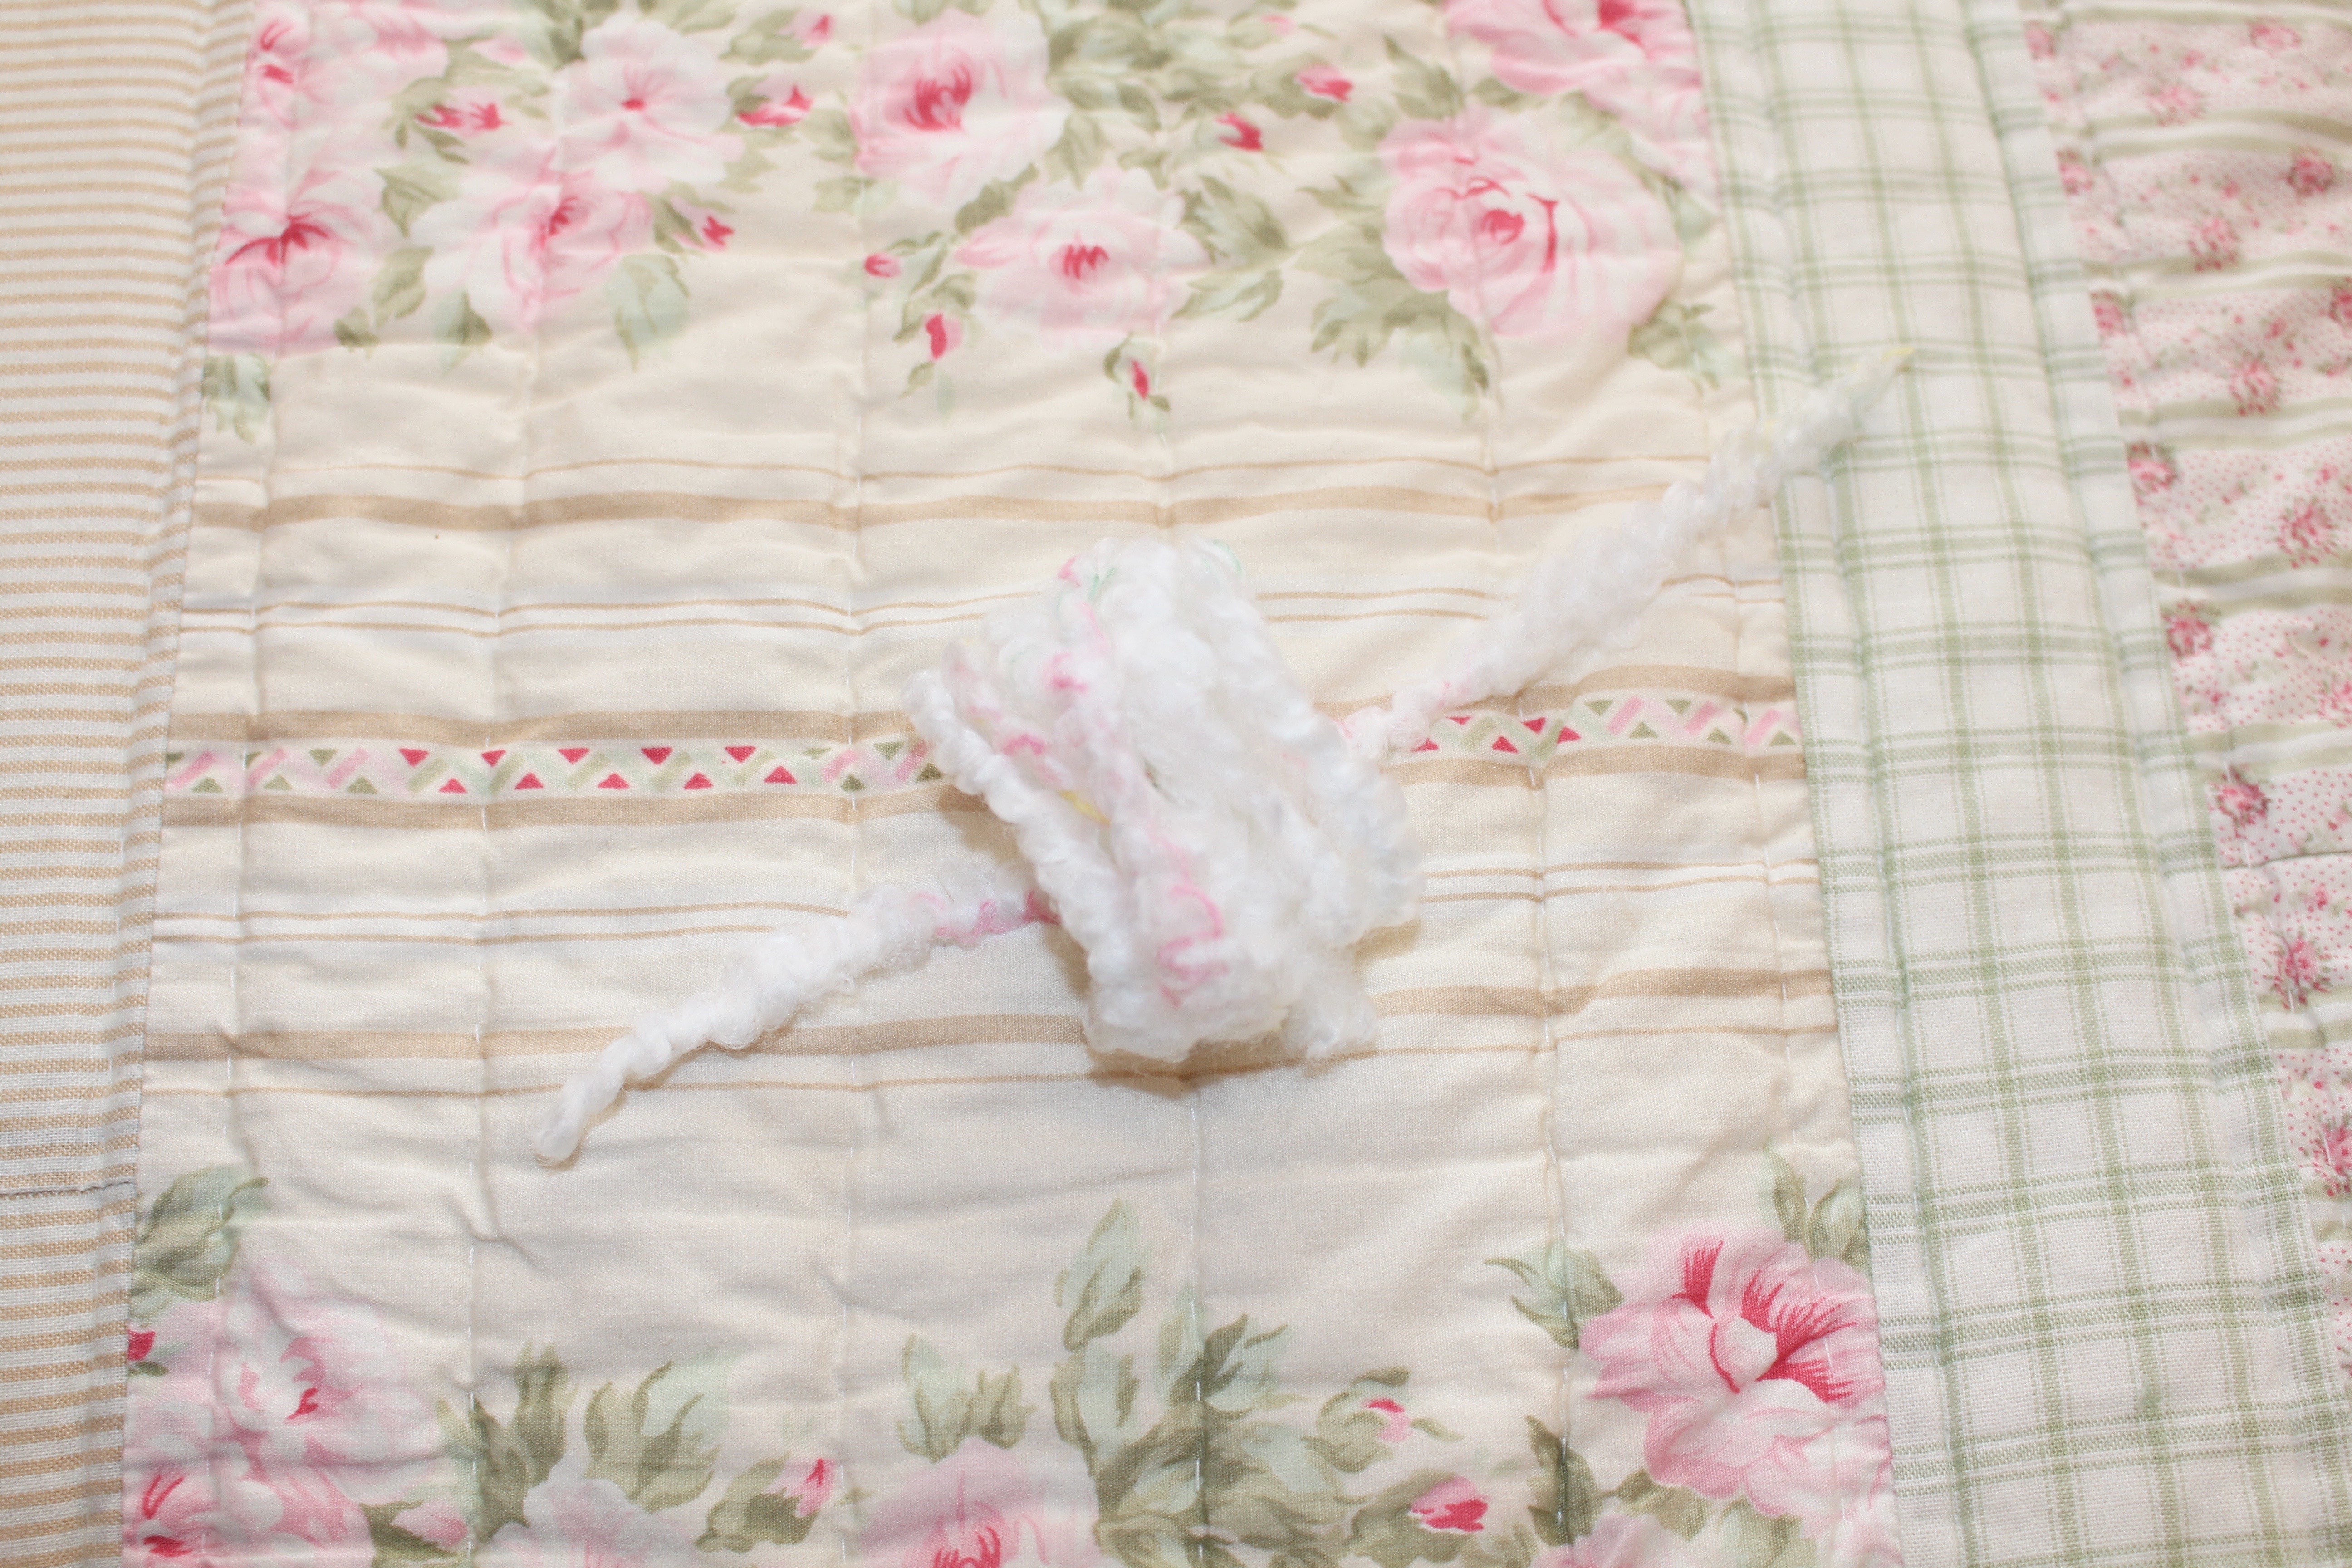
- Slide the yarn off the card stock and take a short piece of yarn and tie it in a knot around the center.
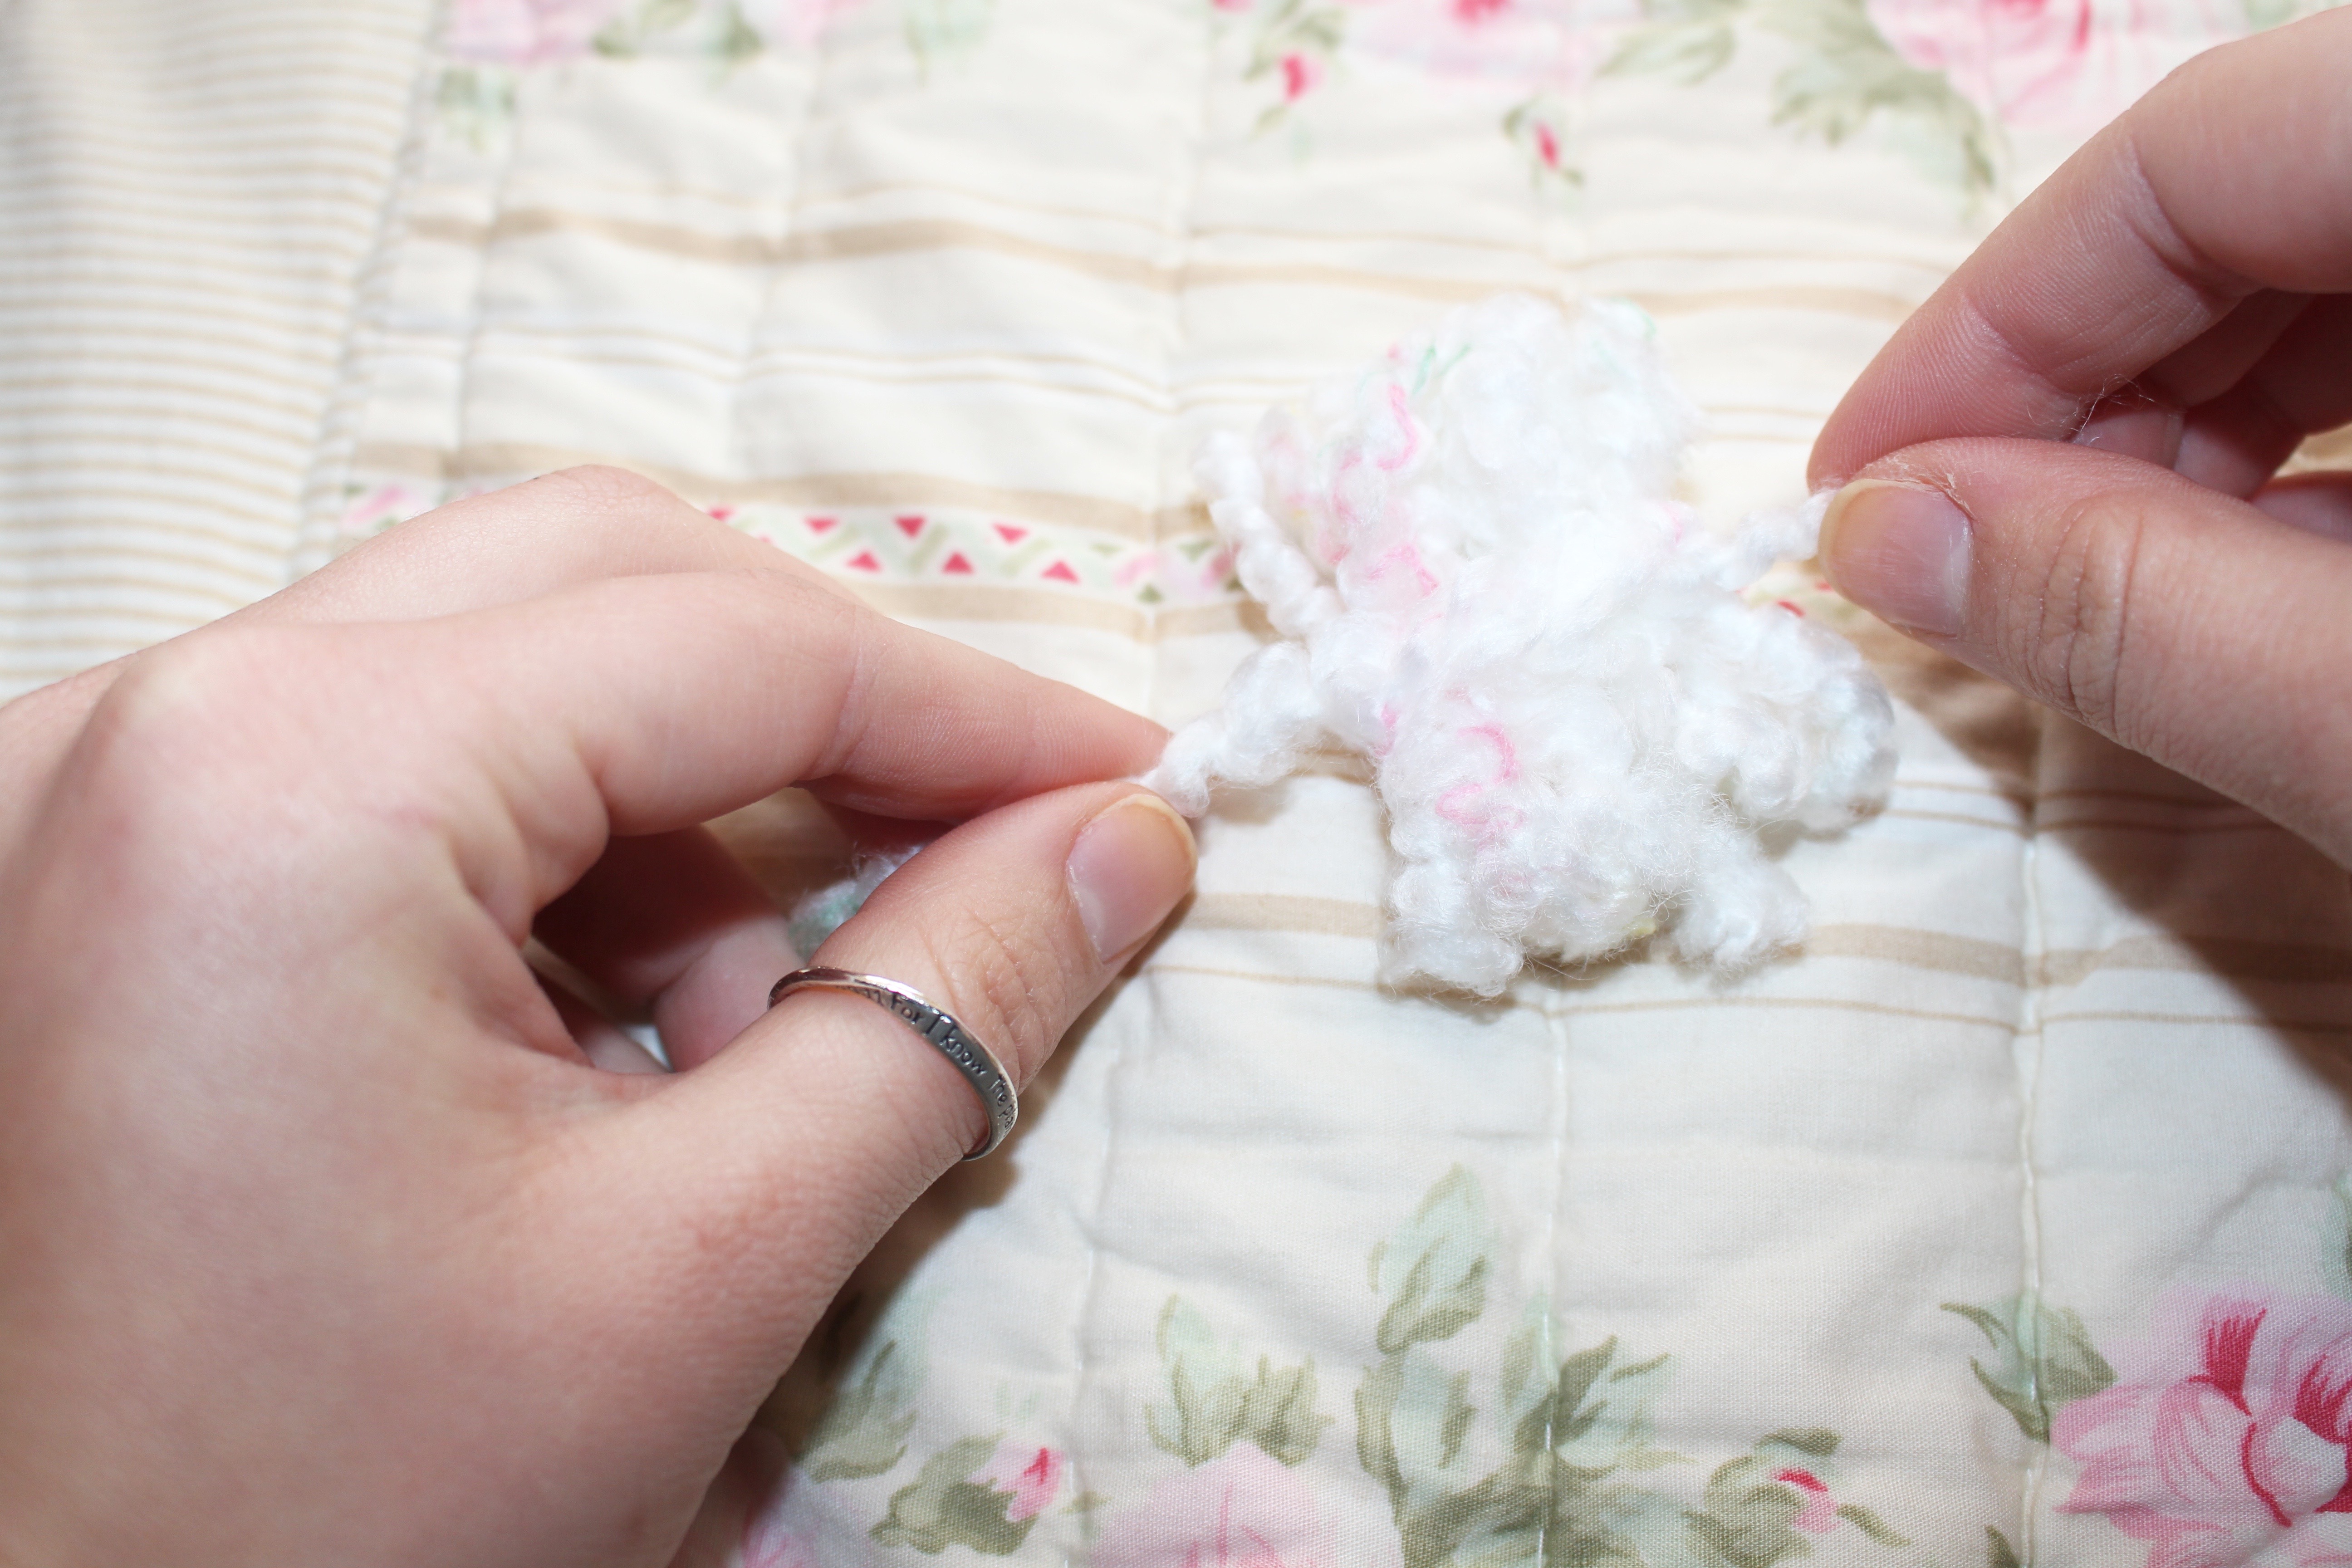
- Then cut through the loops of the yarn to make the pom pom. If you think the pom pom is too big you can cut the pieces of yarn to make them shorter.
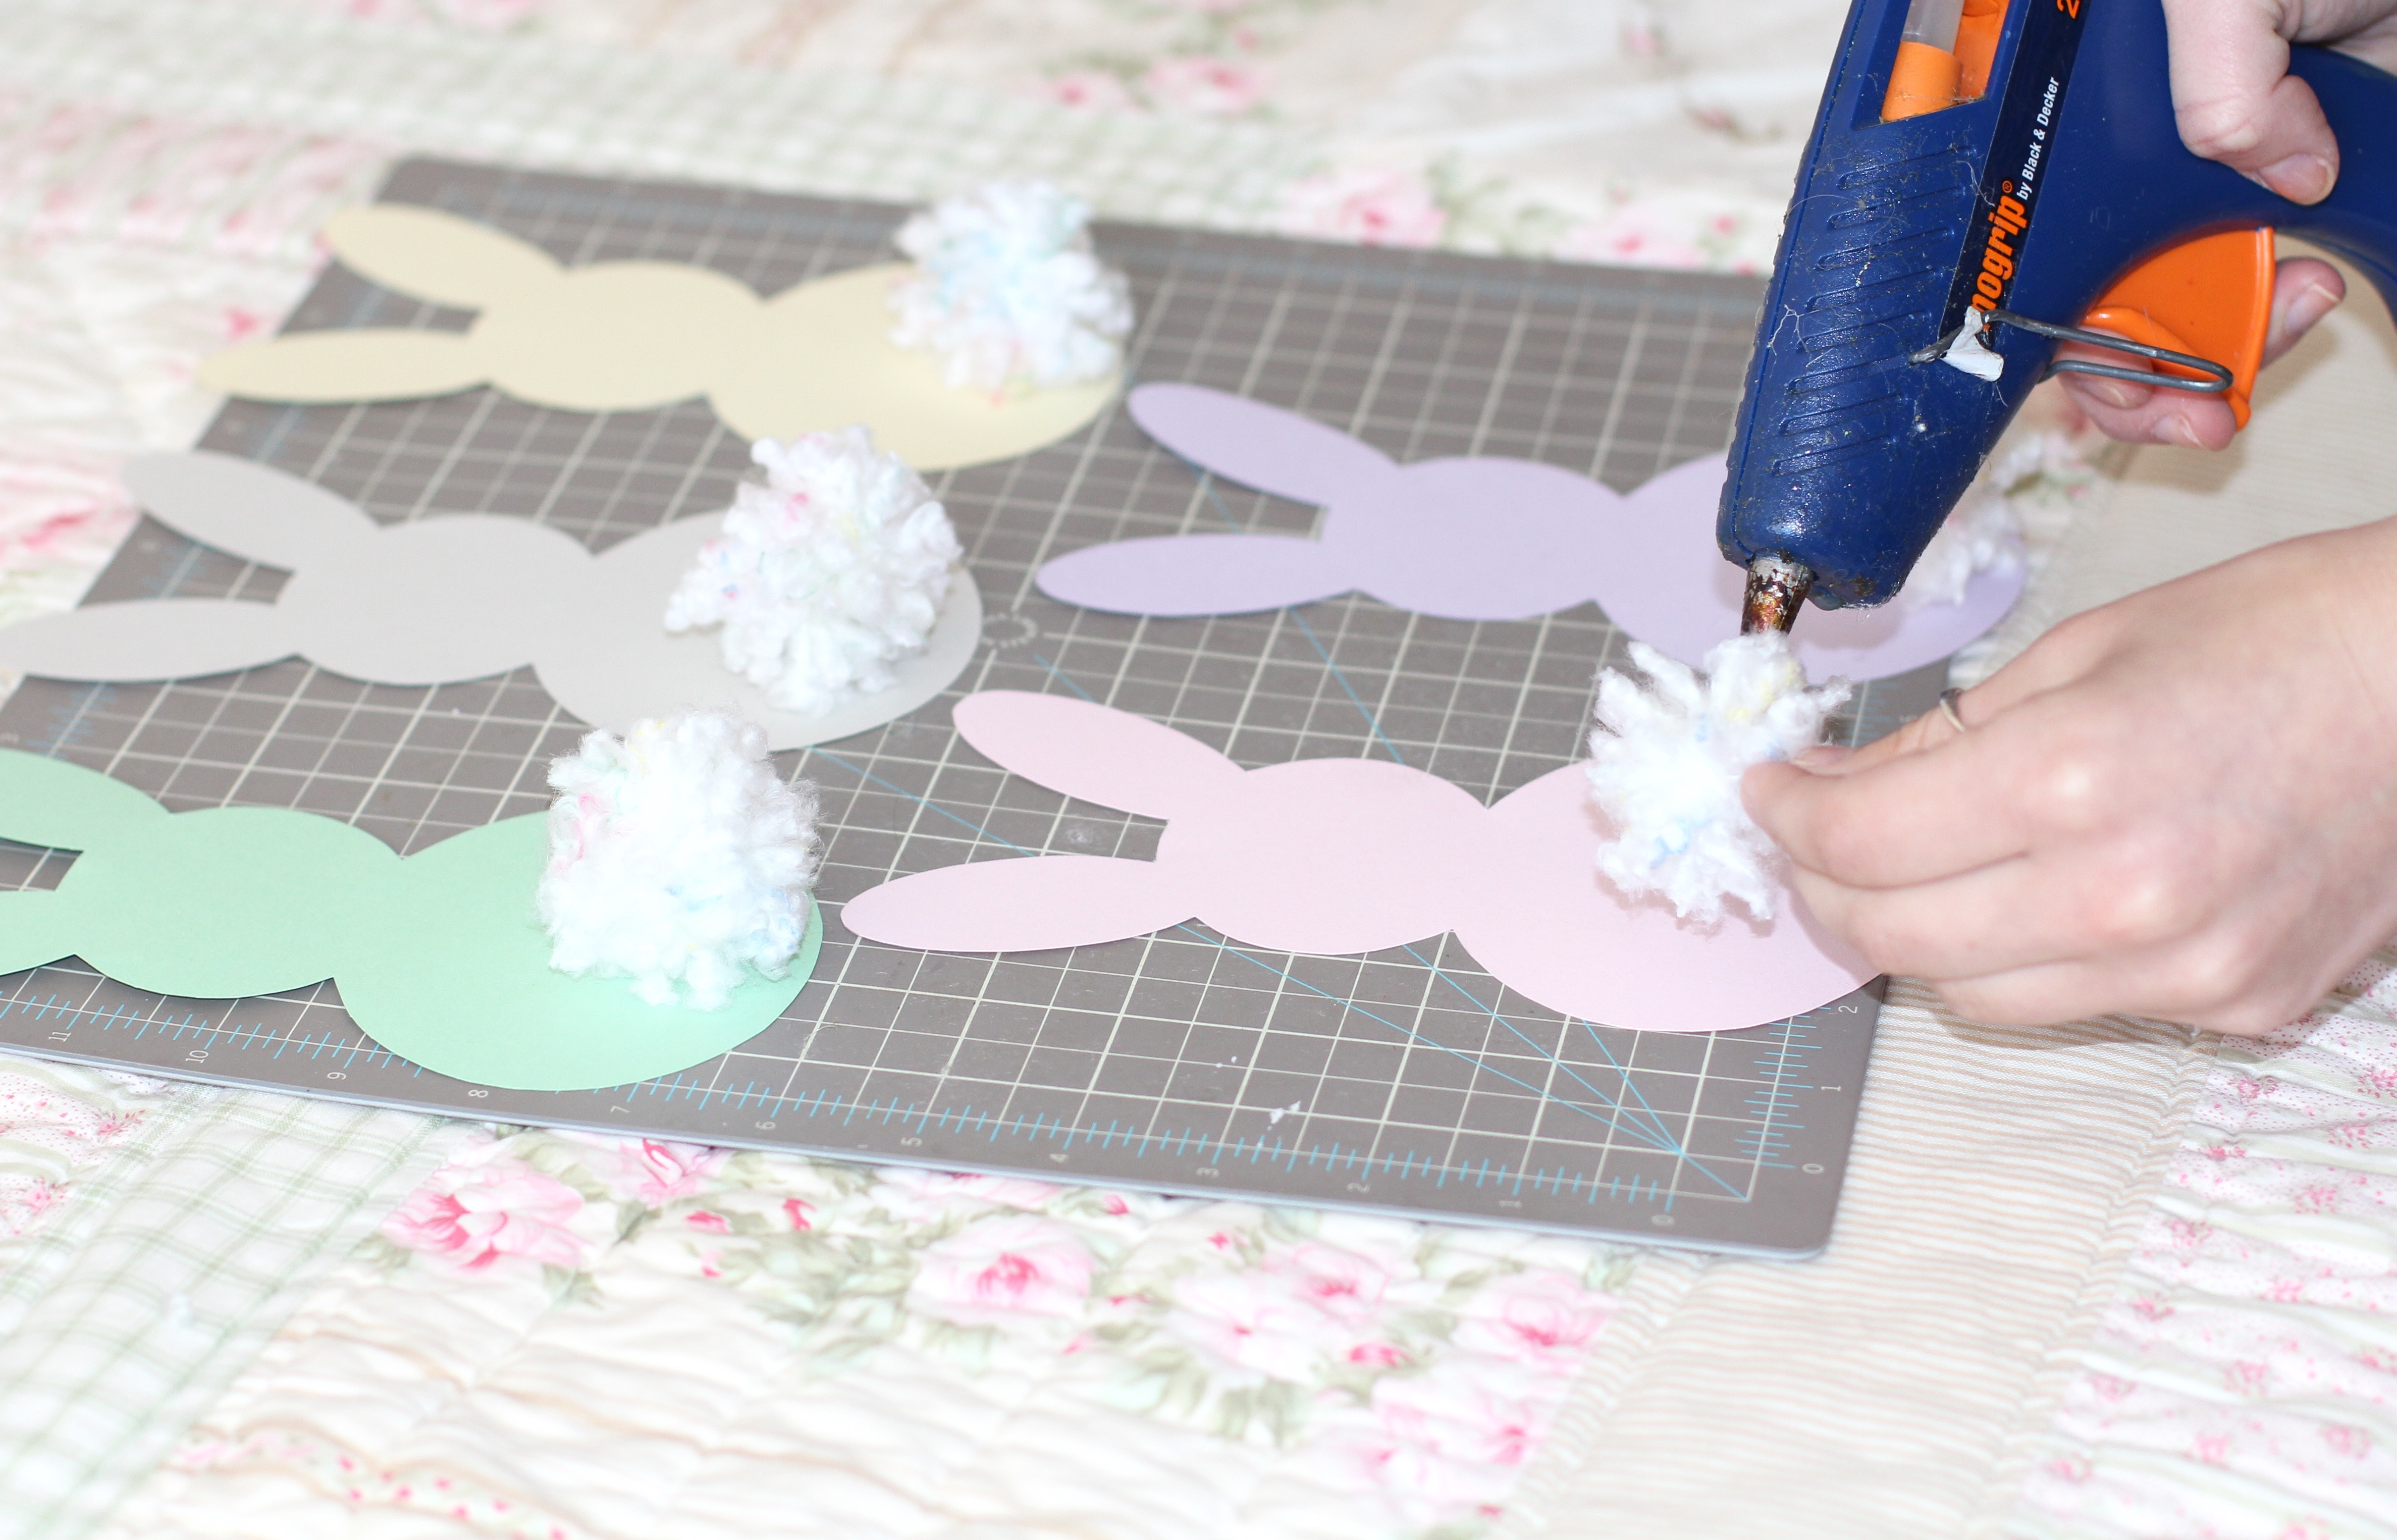
- Use hot glue to attach the pom poms to the bunny to create the tail.
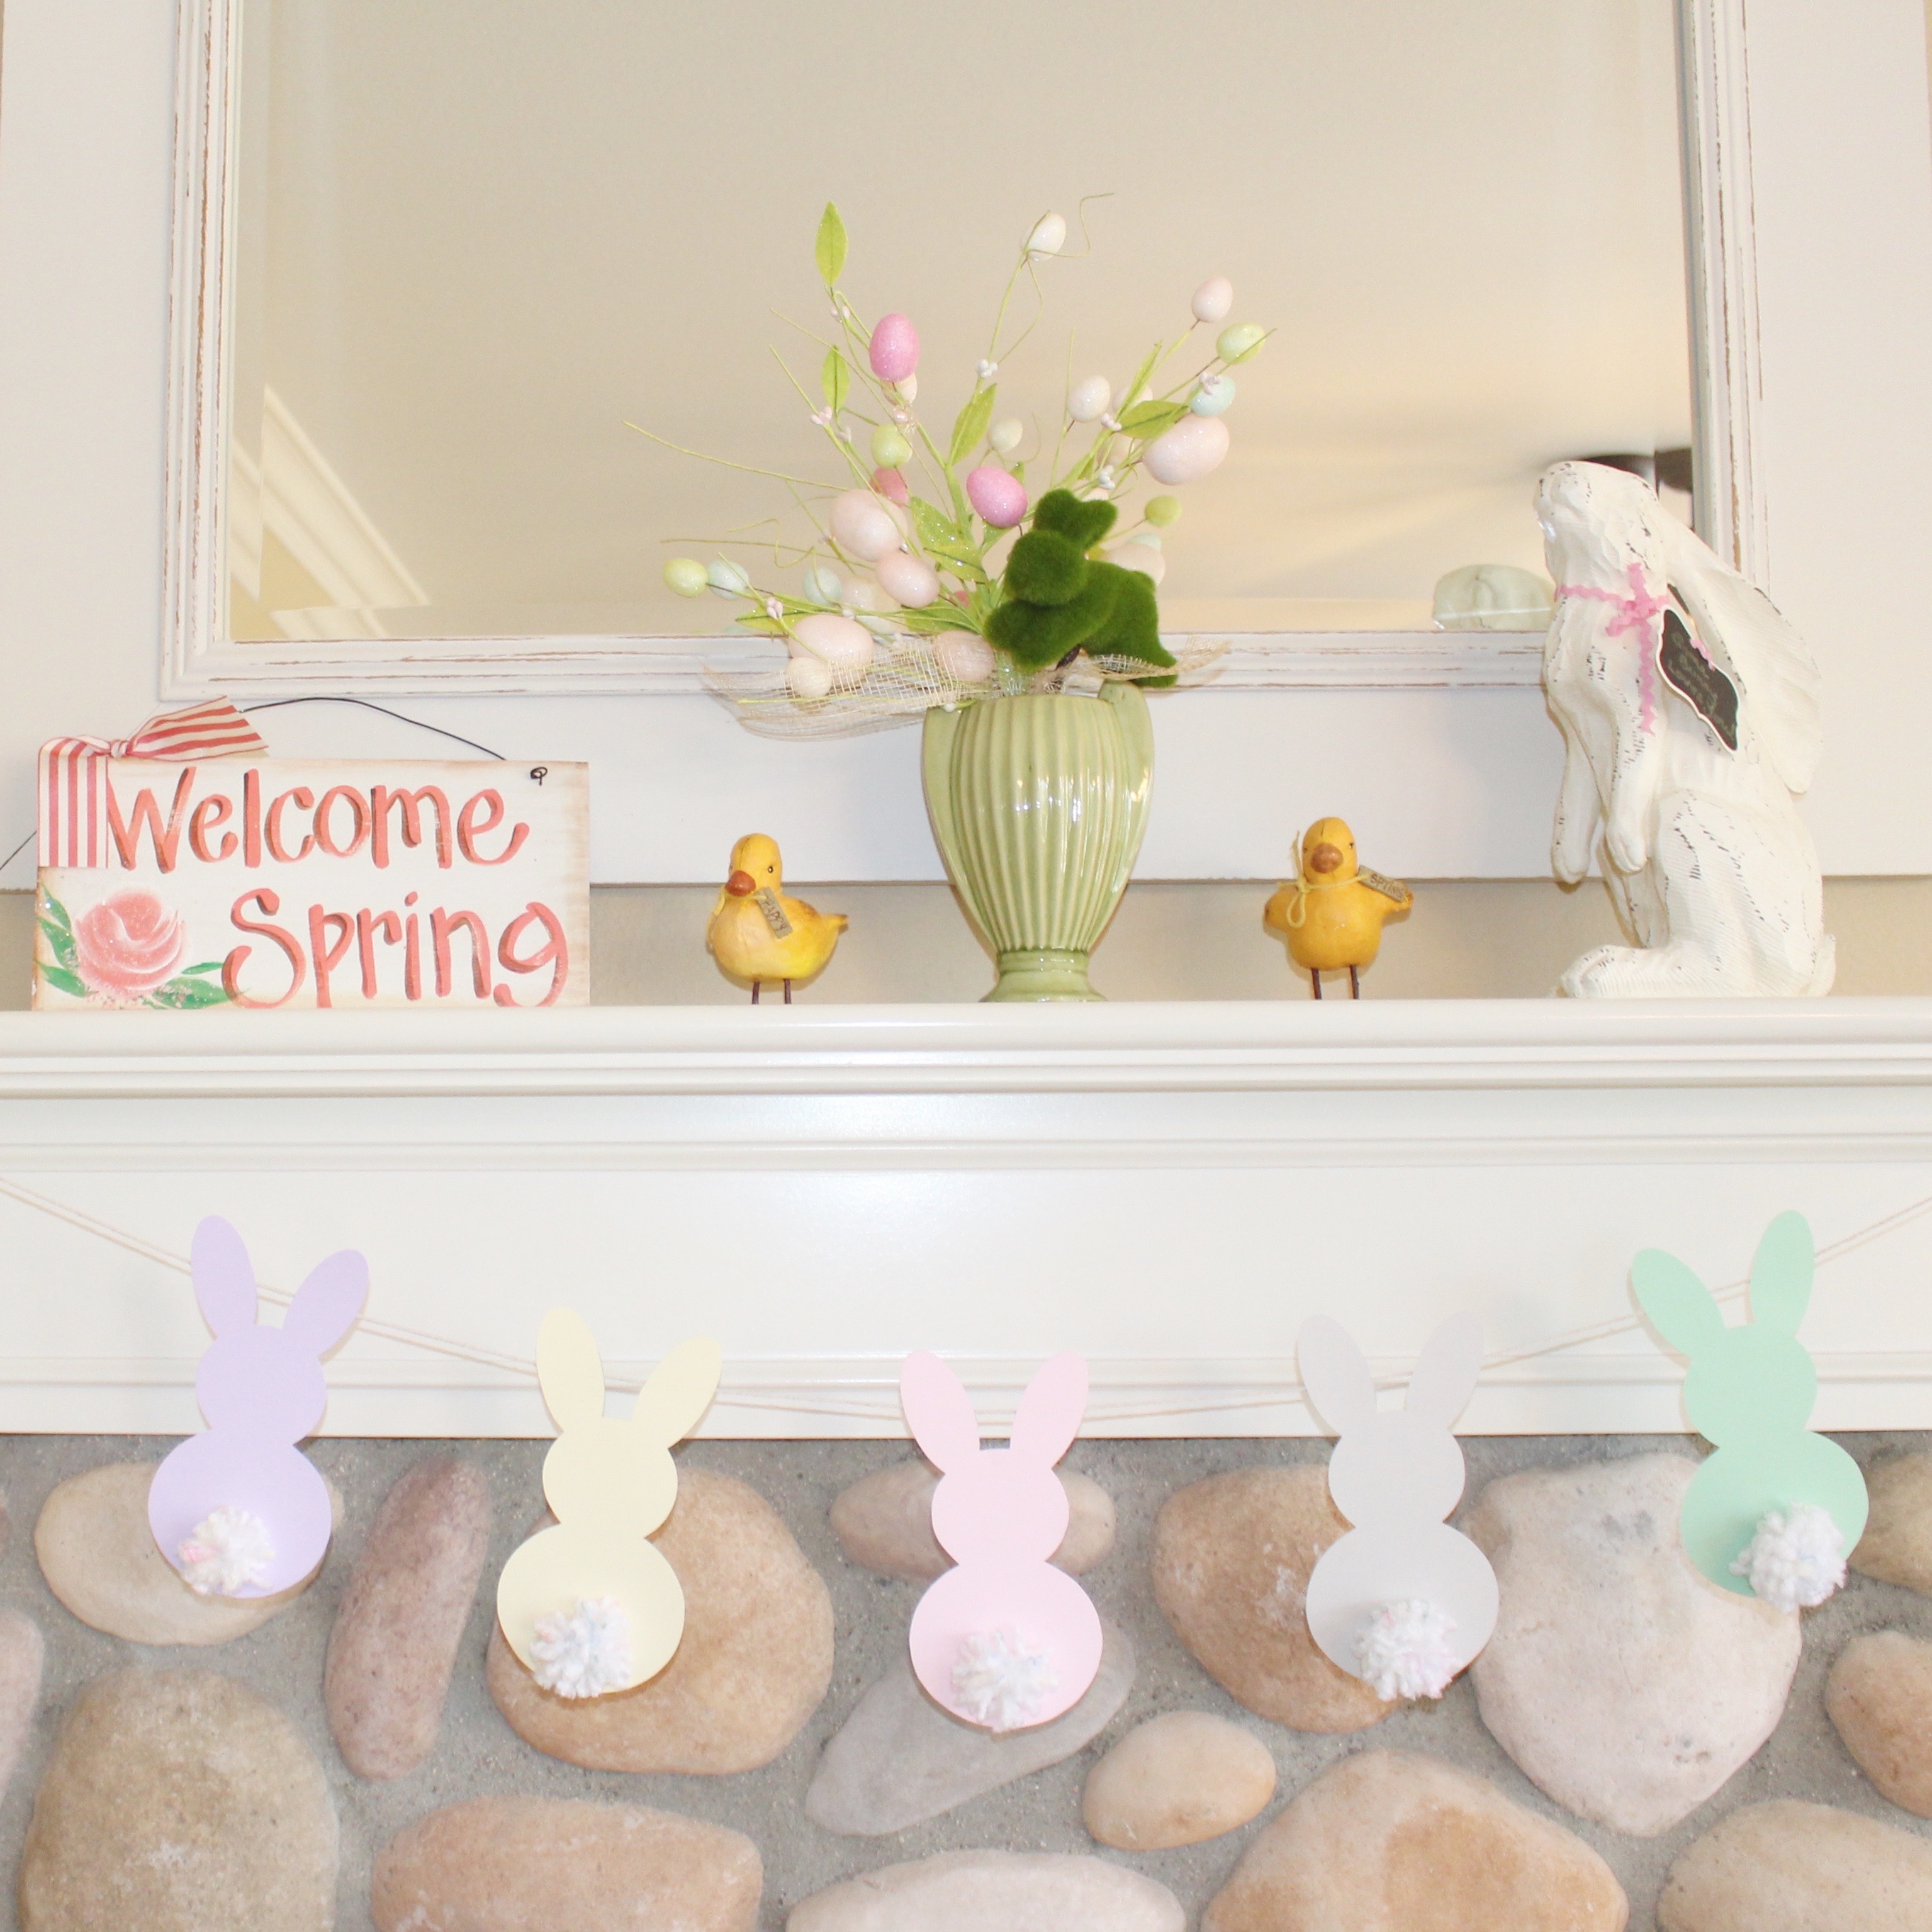
- Attach the bunnies to either a piece of ribbon or string (like I did!) by placing hot glue on the back of both of their ears and then sticking the string to it. Be sure to let it dry.
- Tape the bunny garland to your mantle!

Thanks for reading! Let me know if you try this Easter Bunny Garland DIY!
xoxo Kendall

[…] for Easter and it reminded me of the cute DIY bunny garland I featured last year one the blog (see here). Also, how cute is that little bunny above?! For the past few weeks he has been living in my front […]